
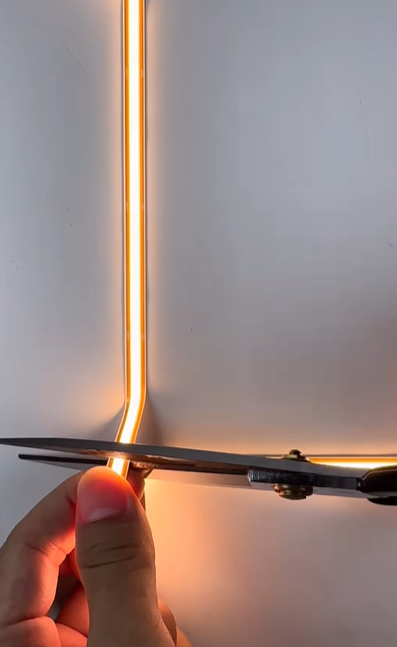
Here, a person uses a pair of scissors to carefully cut the flexible LED neon light along the designated cutting lines.
It’s important to ensure that you cut the strip cleanly to avoid damaging the internal wiring or LEDs.
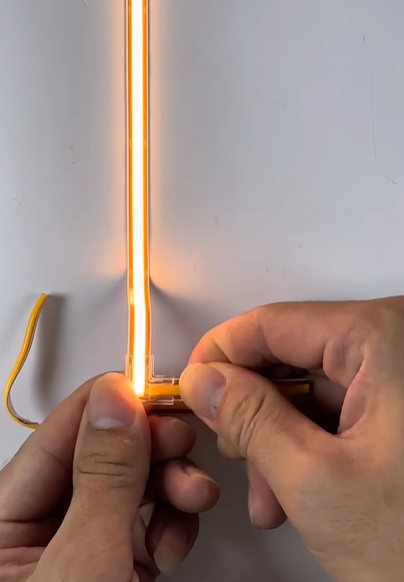
Preparing to Connect the LED Strip
After cutting the LED strip, the next step is preparing it for connection.
The image shows someone holding the LED strip and preparing to attach a connector.
This step is crucial as it ensures that the cut strip will be connected properly to power sources or other strips.
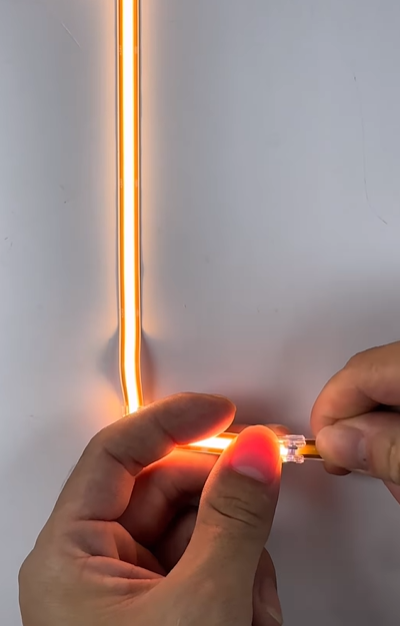
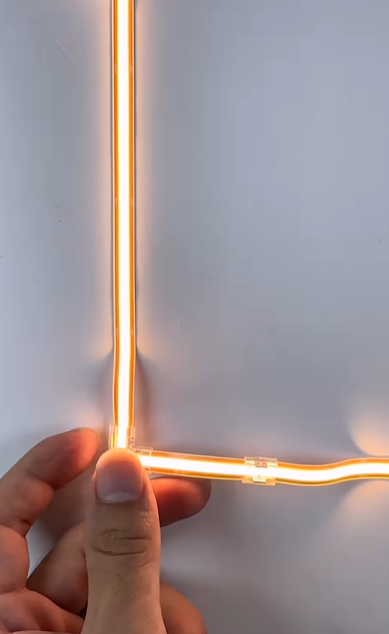
Attaching the Connector to the LED Strip
In this step, the individual attaches a connector to the end of the LED strip.
The connector allows for a secure electrical connection and helps in joining the LED strip to power sources or additional LED strips.
Proper attachment ensures the light works without issues.
Trimming the Excess Wire
Once the connector is attached, any excess wire at the end of the LED strip is trimmed.
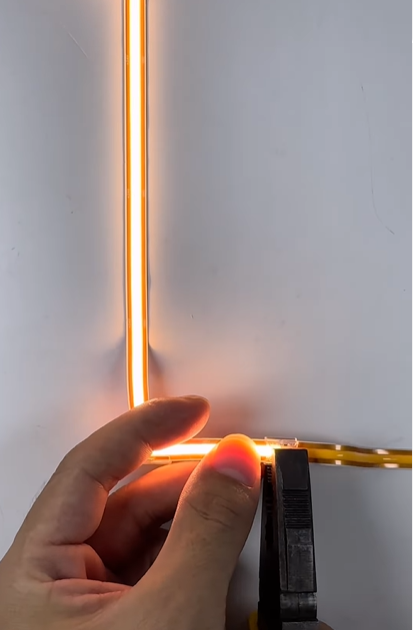
This is done with wire cutters to make the connection neat and ensure that the LED strip functions properly without unnecessary loose wires.
Final Connection of the LED Strip
Now that everything is trimmed and connected, the final step is to join the ends of the LED strips together.
The connector is securely fastened, ensuring that the two pieces of the LED strip are aligned and can function together as a continuous light source.
Working with LED neon lights involves precise cutting, connecting, and trimming to ensure that the strip works as expected.
By following these steps, you can customize and extend your LED light setups for various applications, whether for home decor, signage, or creative projects.