
This guide demonstrates how to connect a light bulb circuit using a breaker, relay switch, and proper wiring.
Follow along through each step to understand the setup process, ensuring safe and functional results.
Initial Setup: Connecting the First Wire
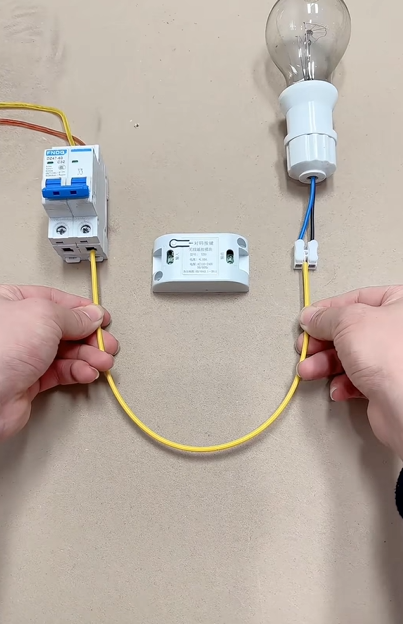
Start by connecting the yellow wire from the breaker to one side of the relay switch and also to the light bulb socket.
This will serve as the neutral line in the circuit.
Adding the Live Wire
Next, connect a red wire from the breaker to the other side of the relay switch and also to the bulb holder.
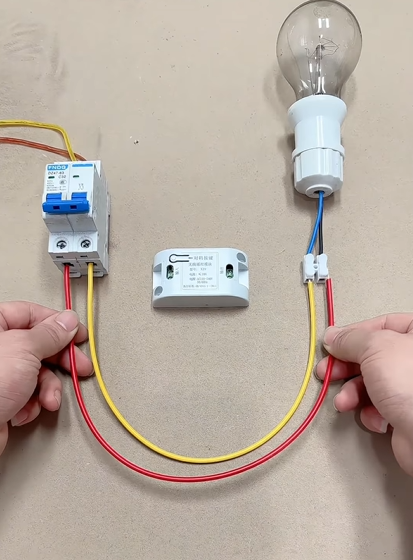
This is the live or phase wire that will carry current when the circuit is active.
Testing the Basic Circuit
With the breaker turned on, the bulb lights up, confirming that the initial circuit is functional.
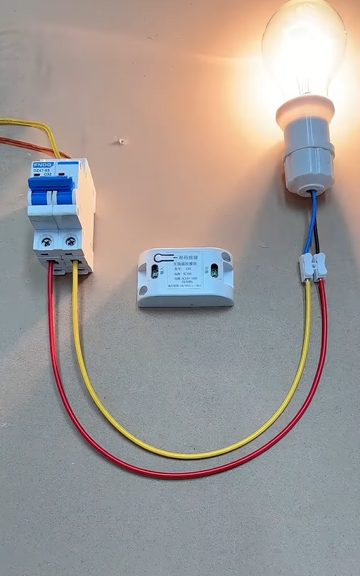
The relay is currently bypassed, allowing current to flow directly.
Interrupting the Circuit for Relay Integration
Cut the yellow wire to integrate it with the relay switch.
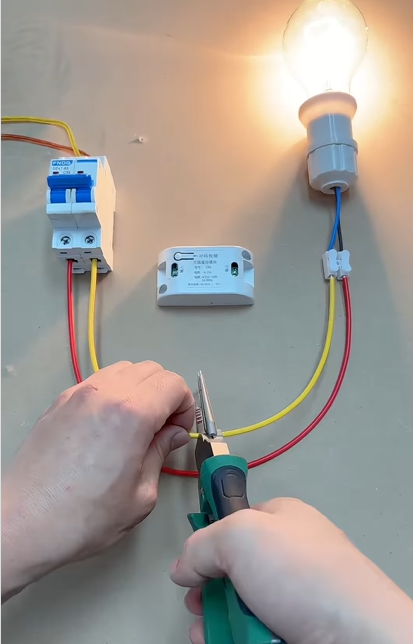
This step prepares the circuit for controlled switching using the relay.
Connecting to the Relay Switch
Now, connect the cut ends of the yellow wire into the designated input and output terminals of the relay.
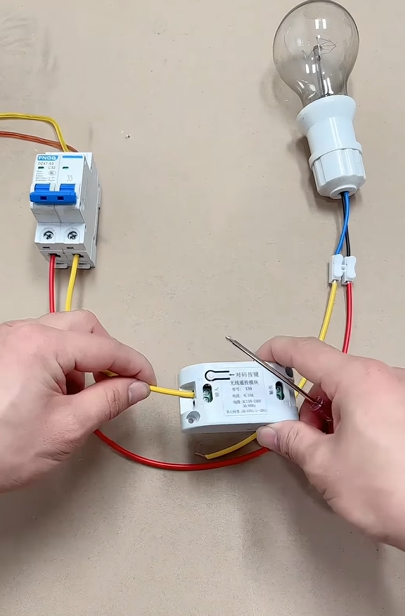
This allows the relay to control the flow of electricity in the circuit.
Finalizing the Relay Connection
Insert the red wire into the remaining terminal on the relay.
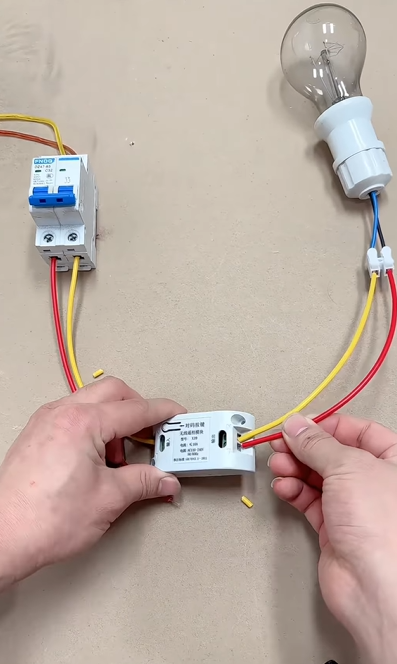
At this stage, the relay is fully integrated into the circuit, allowing remote or automatic control.
Activating the Light with Switches
With everything connected, the light can now be controlled using a set of wall switches.
The relay works in coordination with these switches to power the bulb on or off.
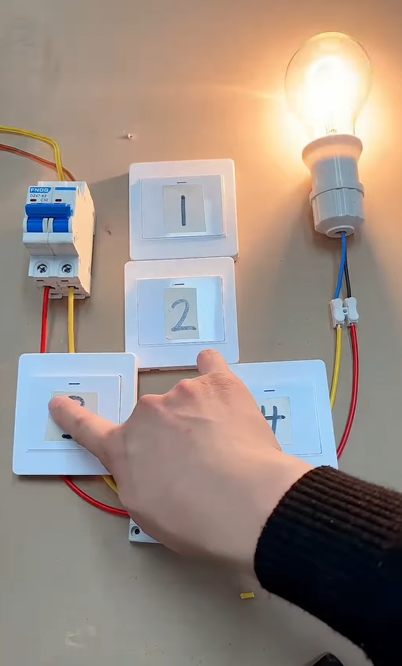
A Simple Yet Effective Lighting Circuit
This step-by-step process shows how to safely wire a light bulb circuit with a relay switch for enhanced control.
Whether you’re working on a DIY home project or learning basic electrical skills, understanding relay integration is essential for creating automated or remotely controlled systems.